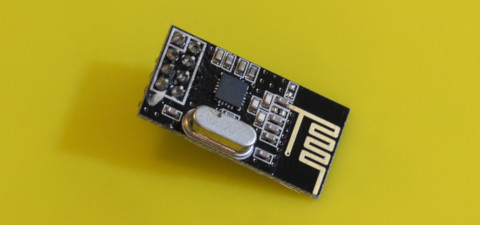
Communications come in three forms:
- Communicating between two embedded devices.
- Communicating between an embedded device and a computer.
- Communicating between arbitrary devices through a common hub or bus.
USB Serial to computer
Using serial communications via the Arduino Serial class is very useful for debugging or to send data to a computer for heavier analysis.
The Arduino IDE has a built-in serial monitor, as do the Visual Micro extension for Visual Studio and other tools. You can also write your own code in, say, Python, to read/write to the serial port and talk to the Arduino board however you please.
Another open source project, called Processing, interfaces very well with Arduino serial communications and allows you to turn your data into visualizations using a simplified Java-like syntax. This will be discussed in detail in a future section.
The following example will transmit the text "Count: " followed by the value of a count variable once per second, incrementing the variable after each message:
int count = 0;

void setup()
{
	// Your serial monitor must match the baud rate here.
	Serial.begin(9600);
}

void loop()
{
	Serial.print("Count: ");
	Serial.println(count);

	// Delay to simulate "doing stuff" between messages.
	delay(1000);

	++count;
}
Notice that it wasn't even necessary to #include anything. The Serial object is already available, although the code won't be compiled into your project unless you actually use it. Using Serial even once in a sketch will pull in a significant amount of code at compile time, so if you decide to use it once, you might as well make full use of it.
The above code uses print and println to send ASCII text data. You may also use write to send raw byte values. To illustrate the difference:
// Convert 65 to the string "65" and send.
Serial.print(65);

// Treat 65 as a byte, the ASCII character 'A', and send.
Serial.write((byte)65);
Serial between two Arduinos
Communicating between two Arduinos is not especially complicated. Things do get more complex if you need to send a variety of structured data back and forth. In the end, you may end up designing a custom network protocol to provide exactly the features you need. Another common method is to use a protocol called I2C, or Inter-Integrated Circuit.
Arduinos have at least one and sometimes multiple pins capable of high-speed serial communications up to 115k baud. Other pins also work at much slower baud rates using the SoftwareSerial library.
High-speed serial communications use considerably more of the available processing power just to handle data, so it's recommended to use the lowest speed that meets your project's requirements.
Software serial port emulation
Arduino devices usually have only one hardware serial port (although the Mega has four), using pins 0 and 1 for Rx and Tx. The same serial port is also used for I/O over USB (including uploading sketches), which can be a bit unwieldy and a limitation when you want to communicate with multiple targets. If your speed and efficiency needs are not too great, the SoftwareSerial library makes it possible to use other pins for serial communications without much more complexity than using the built-in port(s).
Network communications
The ESP8266 is a popular device to link with an Arduino. It provides wireless networking and a rudimentary web server on board.
Connecting the ESP8266 to the Arduino requires a logic level shifter or voltage divider to translate the Arduino's 5v signals to 3.3v for the ESP8266.
