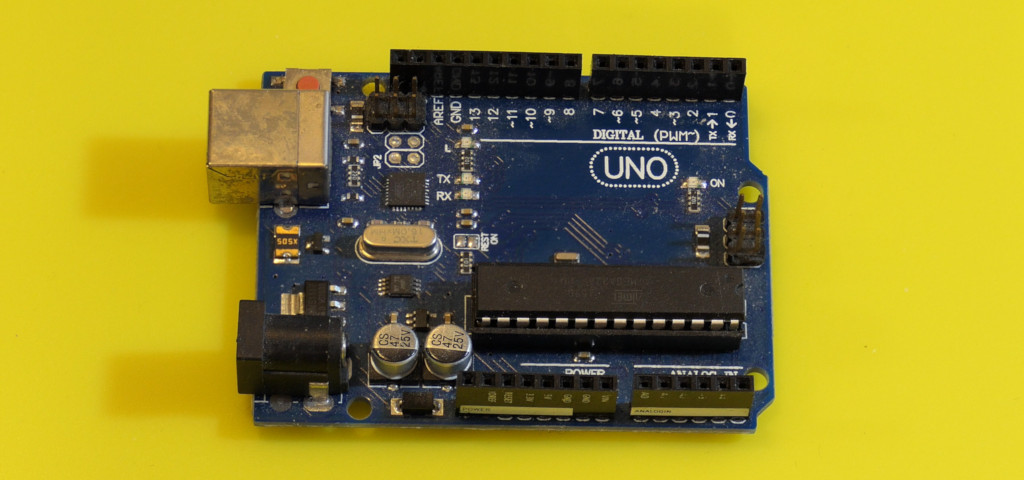
A microcontroller is a small computer that repeatedly reads inputs, makes decisions, and changes outputs. In a useful project, an input might be a door contact and the output a message telling you that the door was left open. Here, the board’s own LED gives us a visible result without buying any extra parts.
What “Arduino” means
“Arduino” can refer to the company, its boards, the related programming tools, or to a wider ecosystem of compatible hardware and code libraries. Our examples use the classic Uno R3 with an ATmega328P microcontroller. Inexpensive “clone” boards should also work just as well for most purposes. Other boards such as the Uno R4 or ESP32 uses a different processor; similar-looking pins do not guarantee identical voltage limits or software behavior.
Set up and upload
- Install the desktop Arduino IDE from Arduino. In Boards Manager install Arduino AVR Boards.
- Connect the Uno using a USB data cable. Select Arduino Uno and the port that appears when you plug it in. A compatible USB interface may need a driver from its manufacturer.
- Create a new sketch, replace its contents with the example below, and click Verify. This compiles the program without sending it to the board.
- Click Upload. After the upload finishes, the onboard LED should alternate on and off once per second.
- Open Serial Monitor and choose 9600 baud. You should see “LED on” and “LED off” alternating. Opening the monitor can reset an Uno and print “Board ready” again.
Download the complete Arduino sketch
void setup() {
  pinMode(LED_BUILTIN, OUTPUT);
  Serial.begin(9600);
  Serial.println("Board ready");
}

void loop() {
  digitalWrite(LED_BUILTIN, HIGH);
  Serial.println("LED on");
  delay(1000);
  digitalWrite(LED_BUILTIN, LOW);
  Serial.println("LED off");
  delay(1000);
}
How the sketch works
setup() runs once after startup or reset. It configures the LED pin as an output and starts serial communication. loop() runs repeatedly. LED_BUILTIN names the board’s own LED pin; HIGH and LOW select its states.
delay(1000) pauses the sketch for 1,000 milliseconds. This is convenient for a first experiment, but it also stops your own loop from checking buttons. Later projects use elapsed-time checks with millis() when several jobs must happen together.
A library packages code for a device or task. A board package supplies the compiler and board definitions. Neither is the same as the bootloader, which is the small program on many boards that accepts uploads.
If it does not work
- No port: try a known data cable and another USB socket. A power light only proves that power reached the board.
- Upload fails: check the board and port selections and close other serial applications. Disconnect anything attached to D0 or D1, which share the Uno’s programming serial connection.
- Garbled text: match Serial Monitor to 9600 baud.
- No LED response: confirm which LED is the onboard indicator, and press Reset once.
Try a useful variation
Change the delay to 200 milliseconds and upload again. Then print a counter instead of a fixed message. You have now practiced the same upload-and-observe cycle used for sensor projects. Next, wire an external indicator and control it with a button.